

Building a partner integration
Use this guide to set up a test account and build a partner integration with Blueprints and Playbooks.
Read Partner integration for the basics. Follow Quick start: Blueprints and Playbooks for the API requests and detailed setup steps.
Part 1. Create a Oneflow account
Create a Oneflow trial account for development. Once it is ready, contact your technical integration manager at Oneflow to remove the trial limitations.
Contact the Oneflow Partner team to arrange a dedicated integration extension and token setup. See partner setup.
Part 2. Set up the required components
You need an API token, a Blueprint with integration fields, and a Playbook with field mappings. Select the Playbook on a template to use those fields in contracts. Add a webhook if your application needs to respond to contract events.
Step 1. Get an API token
Use a token for the intended integration. For development with Custom Integration, enable it in Marketplace, then manage tokens under Admin > Integrations > Custom Integration > API tokens.
See API token for token management. For a dedicated partner integration, follow the token setup agreed with the Oneflow Partner team.
Step 2. Create a Blueprint and its fields
Define the fields your application needs, such as a deal ID or company name. Give each field a stable custom_id. Mark its mapping as required only when the integration needs that value to work.
For development with Custom Integration, open Admin > Integrations > Custom Integration > Integration blueprints.
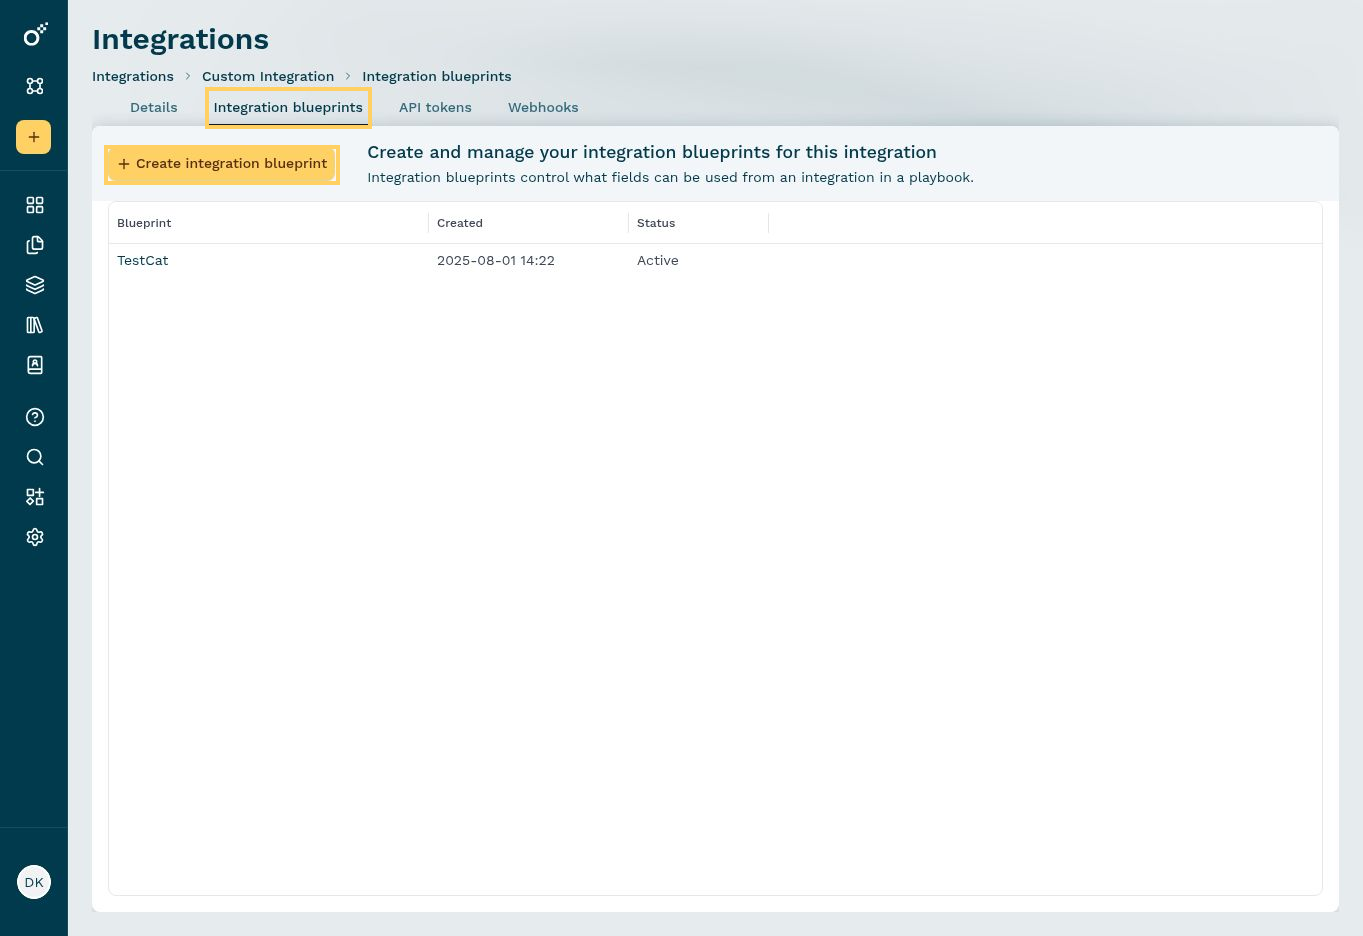
Follow Quick start: Blueprints and Playbooks to create the Blueprint through the API or use the Admin alternative. See Integration Blueprint field for the field properties.
Step 3. Create a Playbook and map the fields
In Admin > Playbooks, create or open a Playbook. Under Connected integrations, connect your Blueprint.
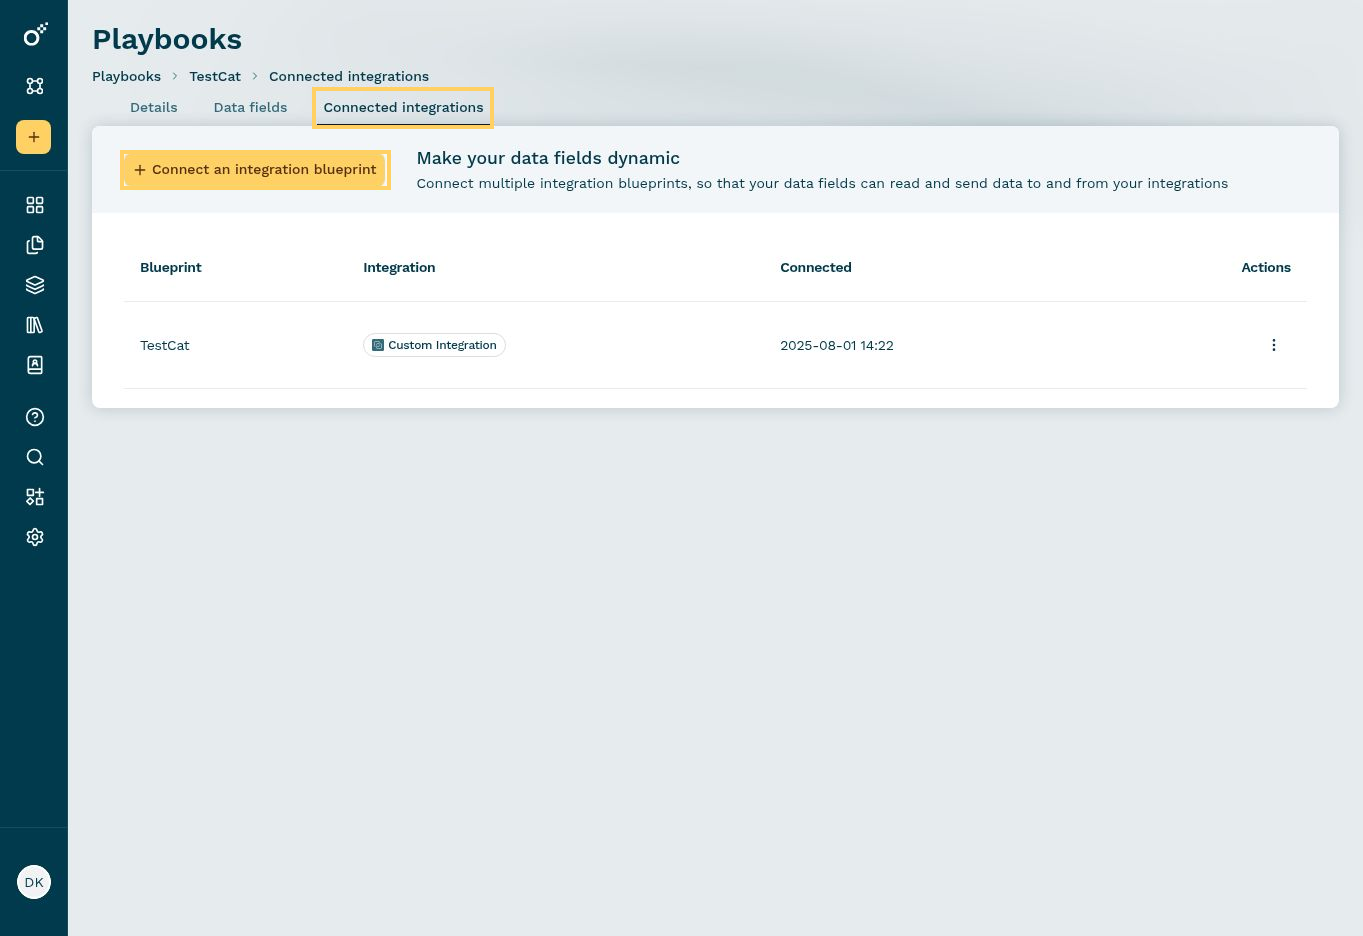
Open Data fields and map the Blueprint fields to the matching Playbook fields. Reuse an existing Playbook field when it already represents the same value.
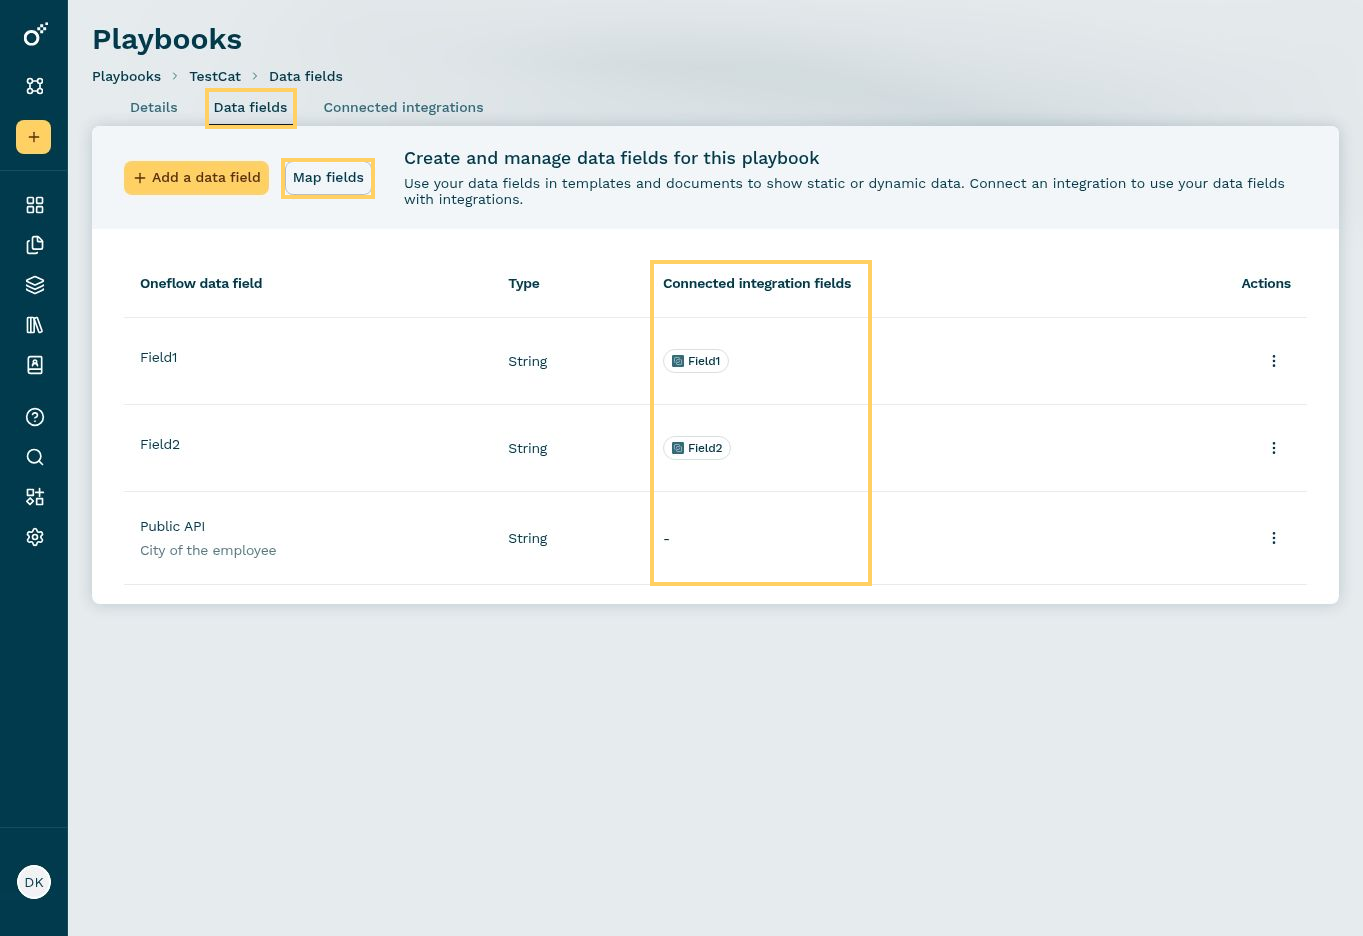
Follow the Playbook setup in Quick start: Blueprints and Playbooks. Create the Playbook and mappings in Oneflow Admin; these operations are not available through the Public API.
Step 4. Set up a webhook
If your application needs to respond to events, register its webhook separately. Choose the event and add a BLUEPRINT filter when you need to limit notifications to that Blueprint's contracts.
Follow Webhooks and integration responsibilities. It covers filters, signature verification, duplicate notifications, and responses.
Part 3. Test API access
Call GET /v1/accounts/me with your token. Check the returned account and token_info.integration before saving the customer connection.
See Integration identity and token context for the request and response.
Part 4. Prepare a template and test the workflow
Step 1. Select the Playbook on a template
Open a test template, then open Data fields. Under Select playbook, choose your Playbook and use its fields in the template content, forms, or rules.
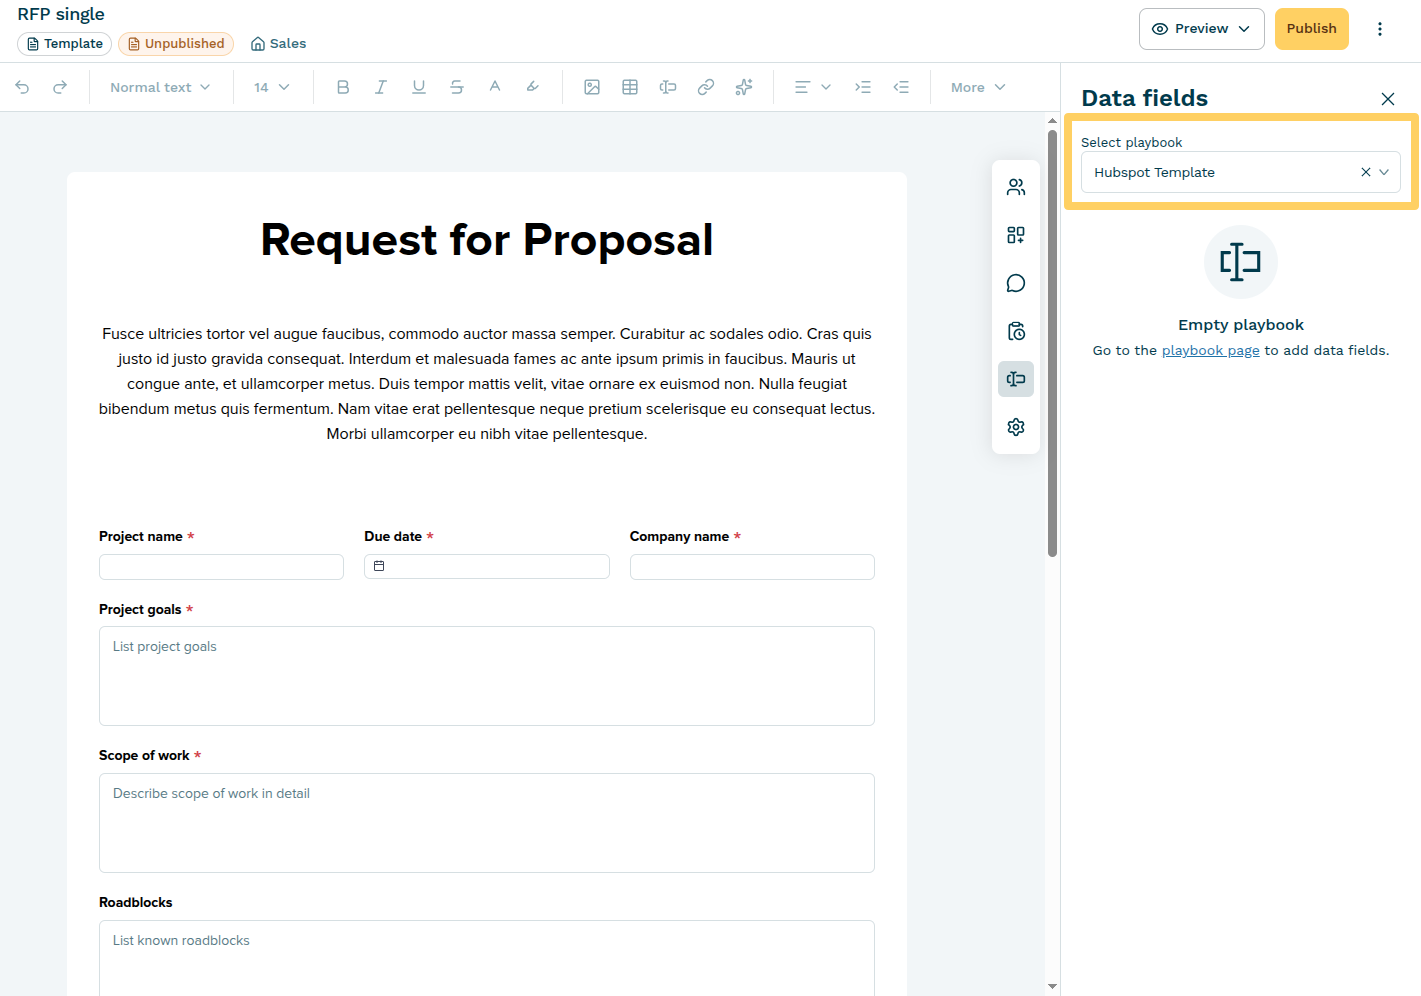
Follow the template setup in Quick start: Blueprints and Playbooks.
Step 2. Check user access
Make sure your test user can access the workspace and template. For requests that require x-oneflow-user-email, use the email address of an active Oneflow user.
See the prerequisites and contract creation request in Quick start: Blueprints and Playbooks.
Step 3. Test the complete workflow
Create a test contract, check the mapped values, and test any webhook actions. Follow the end-to-end test in Quick start: Blueprints and Playbooks.
Before adding customers, review Account-scoped lifecycle. Keep tokens and object IDs separate for each customer account.
If you are updating an existing integration, follow Migration guide before changing its setup.
Updated about 20 hours ago