Building a partner integration
This guide will provide a concise guide on how to get started for you as a partner building integration with Oneflow.
Part 1. Create a Oneflow account
Start your work by creating an account. Go to the Oneflow application and create a trial account.
Once you have your account, email your technical integration manager at Oneflow to remove the trial limitations.
Part 2. Set up required Oneflow components
To build full partner integration, you will need to set up the following components in Oneflow:
- Create an API token — to provide API access to your test account,
- Create a template type — to connect contracts created by you with your integration,
- Add data fields to your template type — used to transfer individual variable into the contract
- Create a webhook — to sync statuses and events with your system.
Oneflow integration extension
Towards the end of development, Oneflow will create a Oneflow integration extension that automates the integration setup and creates all the components required for the integration to work properly. This extension makes it possible for end-users to enable the integration with a single click.
However, during development, you will need to create and configure these components manually. We have added notes below explaining how manually creating the components differs from creating them with the Oneflow integration extension.
Step 1. Create an API token
To learn how to create API tokens in Oneflow, please, see the Create an API token section.
Step 2. Create a template type
In Oneflow, users create contracts from templates. Templates, in their turn, can optionally have a template type. Template types connect the contracts you create with your integration. An example of this connection is ensuring the correct webhook is triggered for events in the contract.
- To create a template type, you first have to enable the Template types extension. To do that, go to the Oneflow application Admin > Account > Extensions page, and toggle the Template types extension.
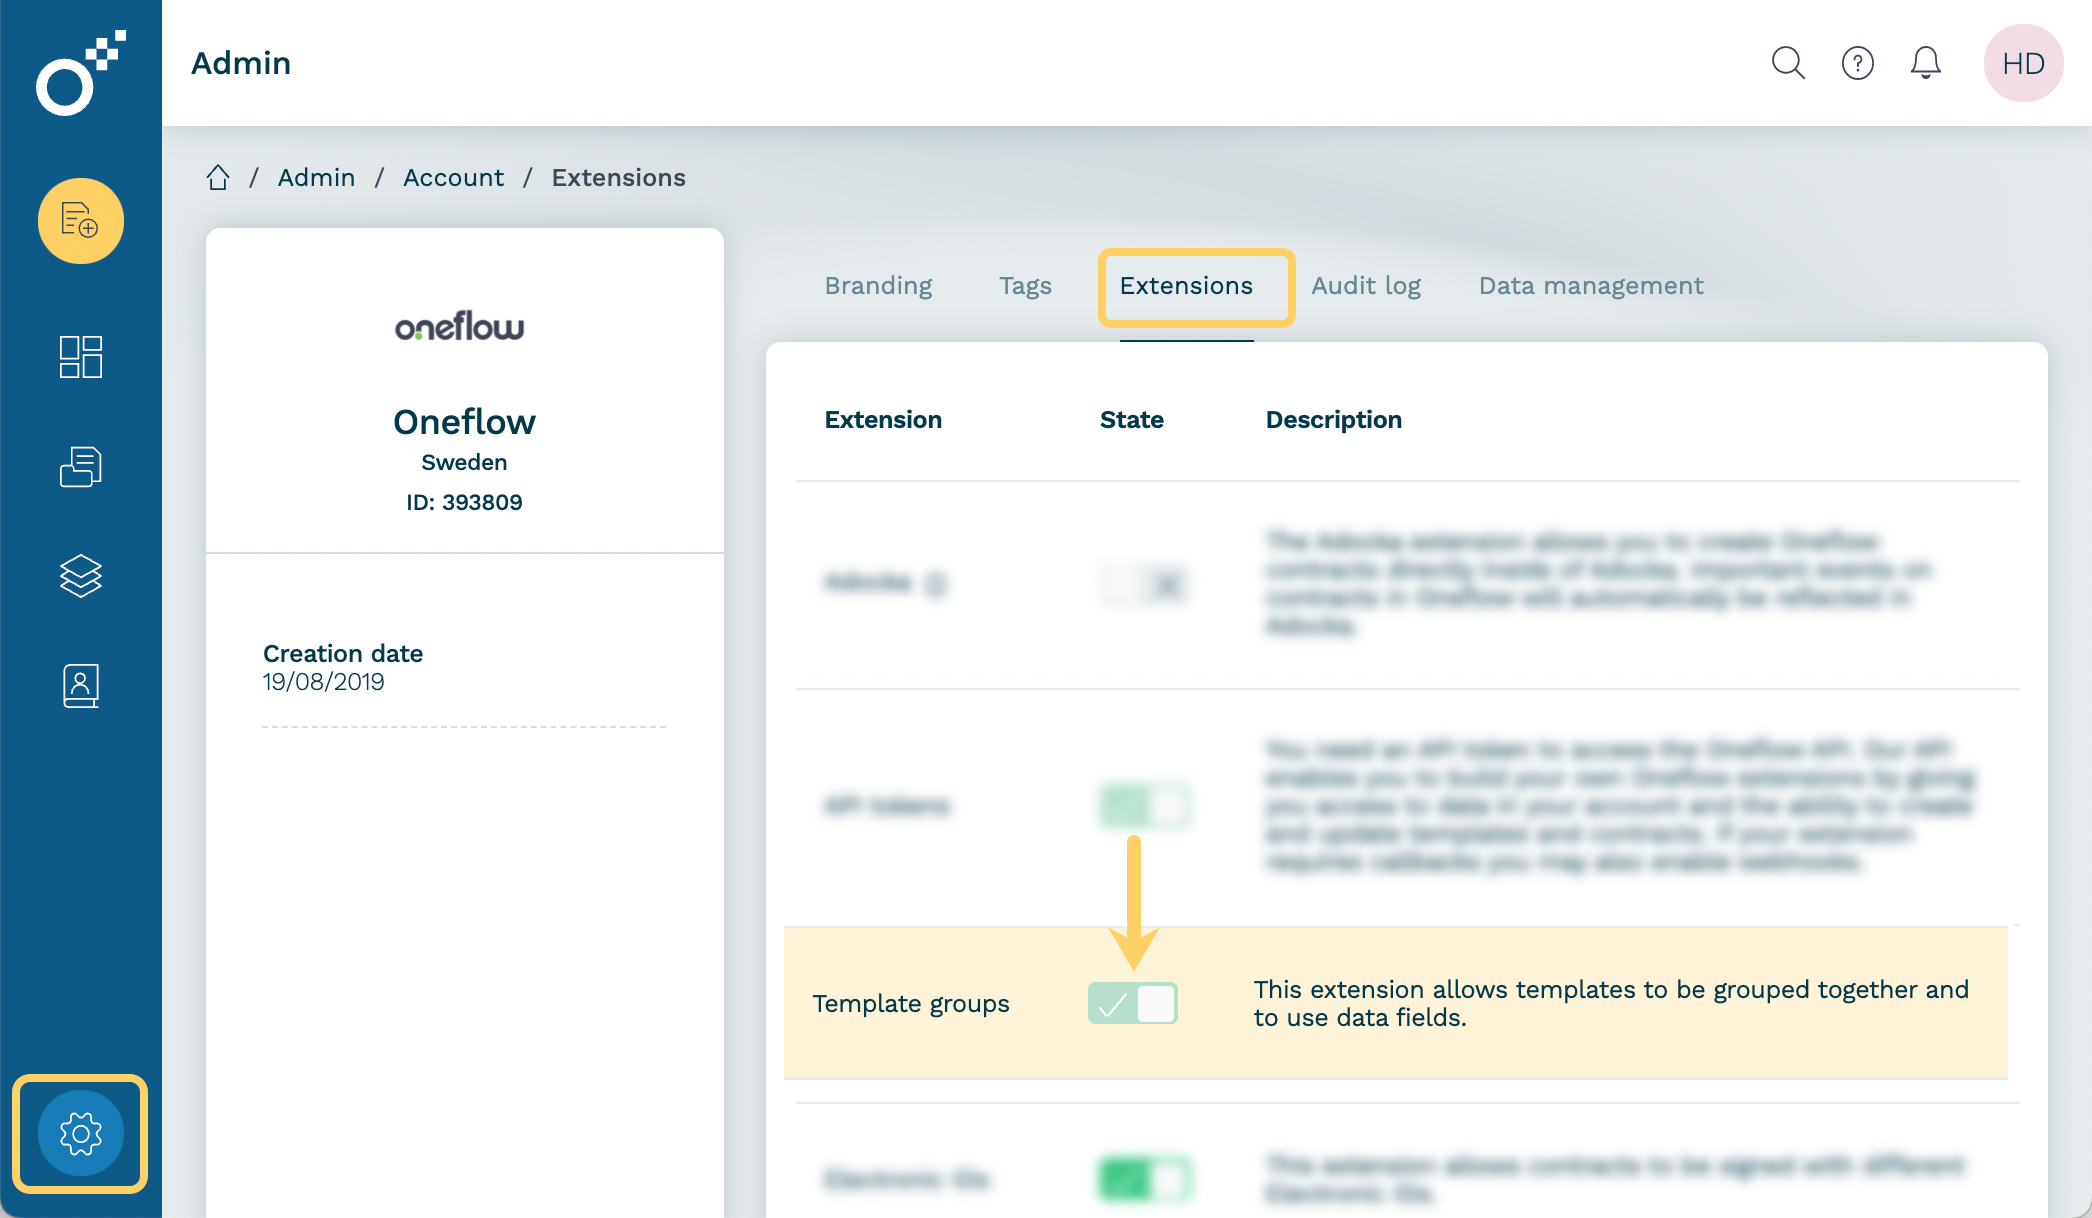
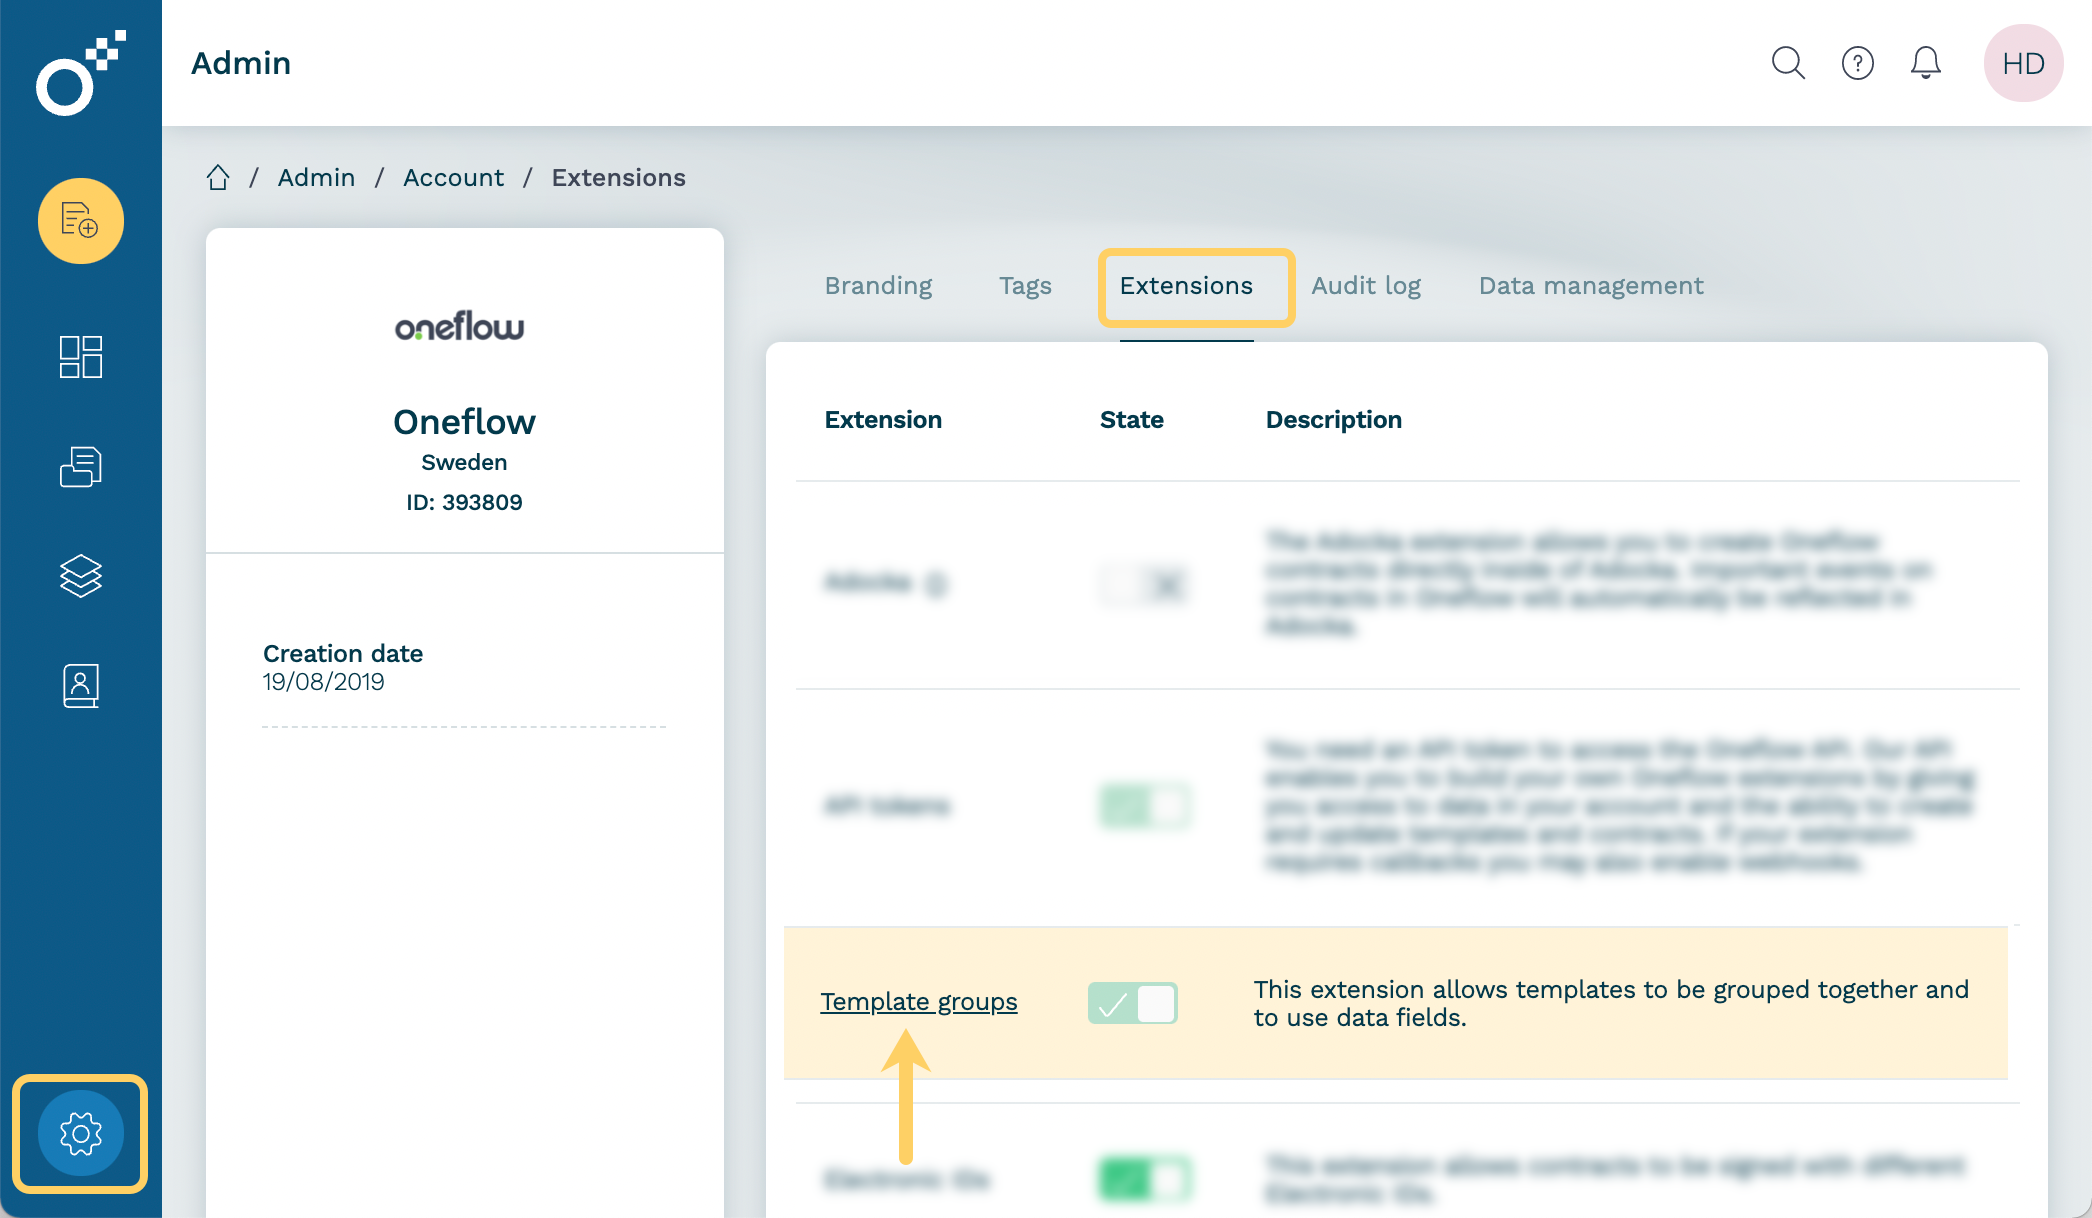
Note:In the current version of Oneflow, the extension is labeled as template groups and will be renamed to template types in future versions.
- When enabled, click the Template types link and then Add a template type.
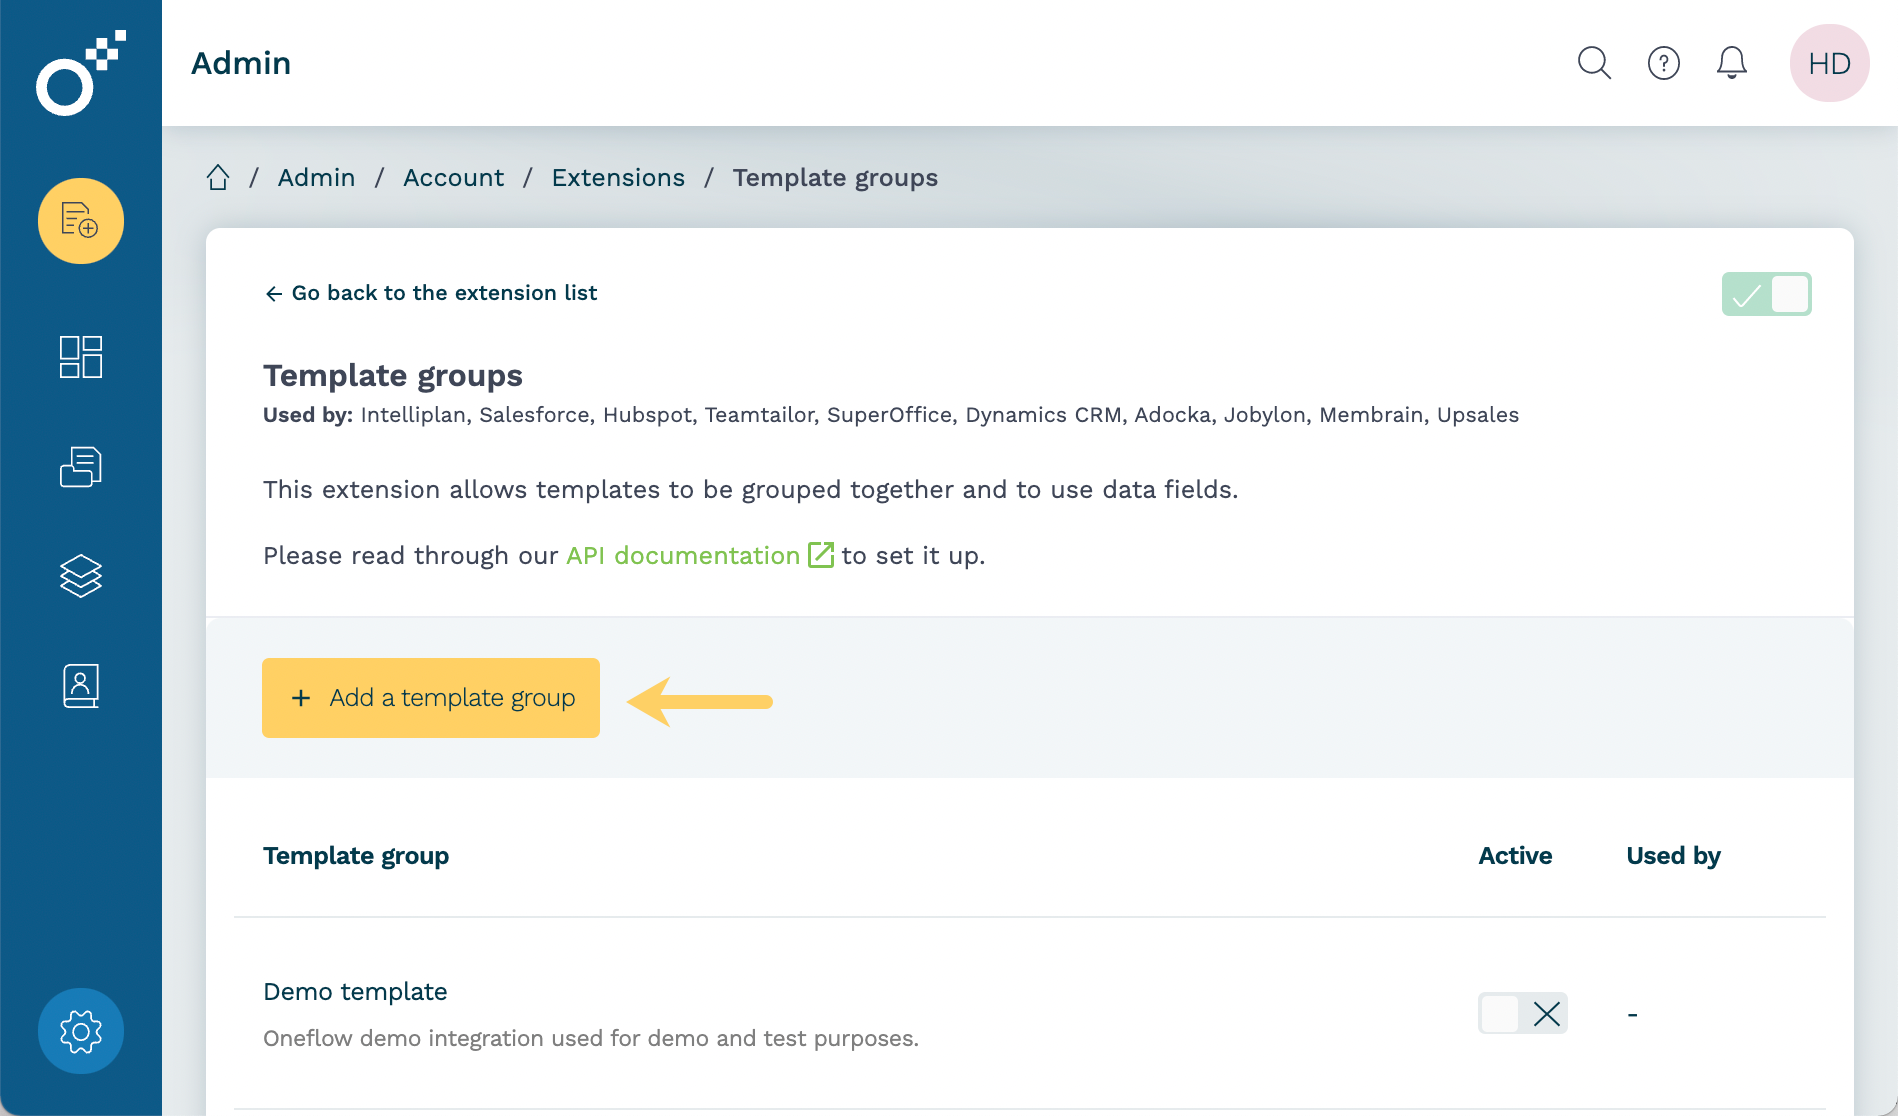
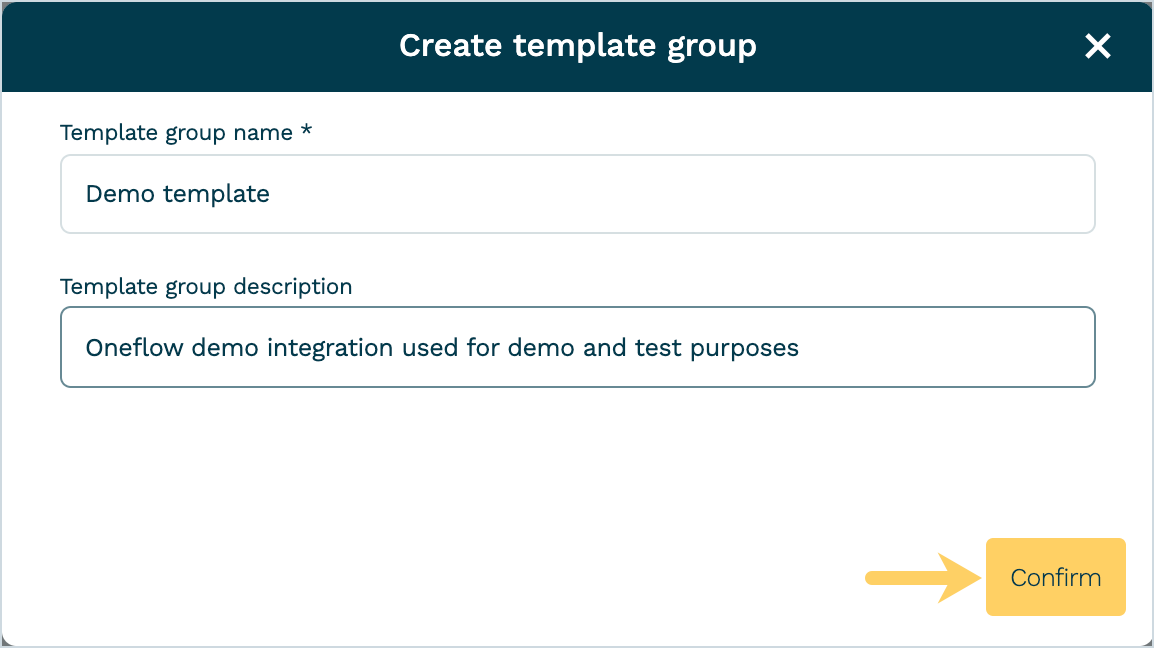
- Fill in the Template group name and, optionally, Description field. Then click Confirm.
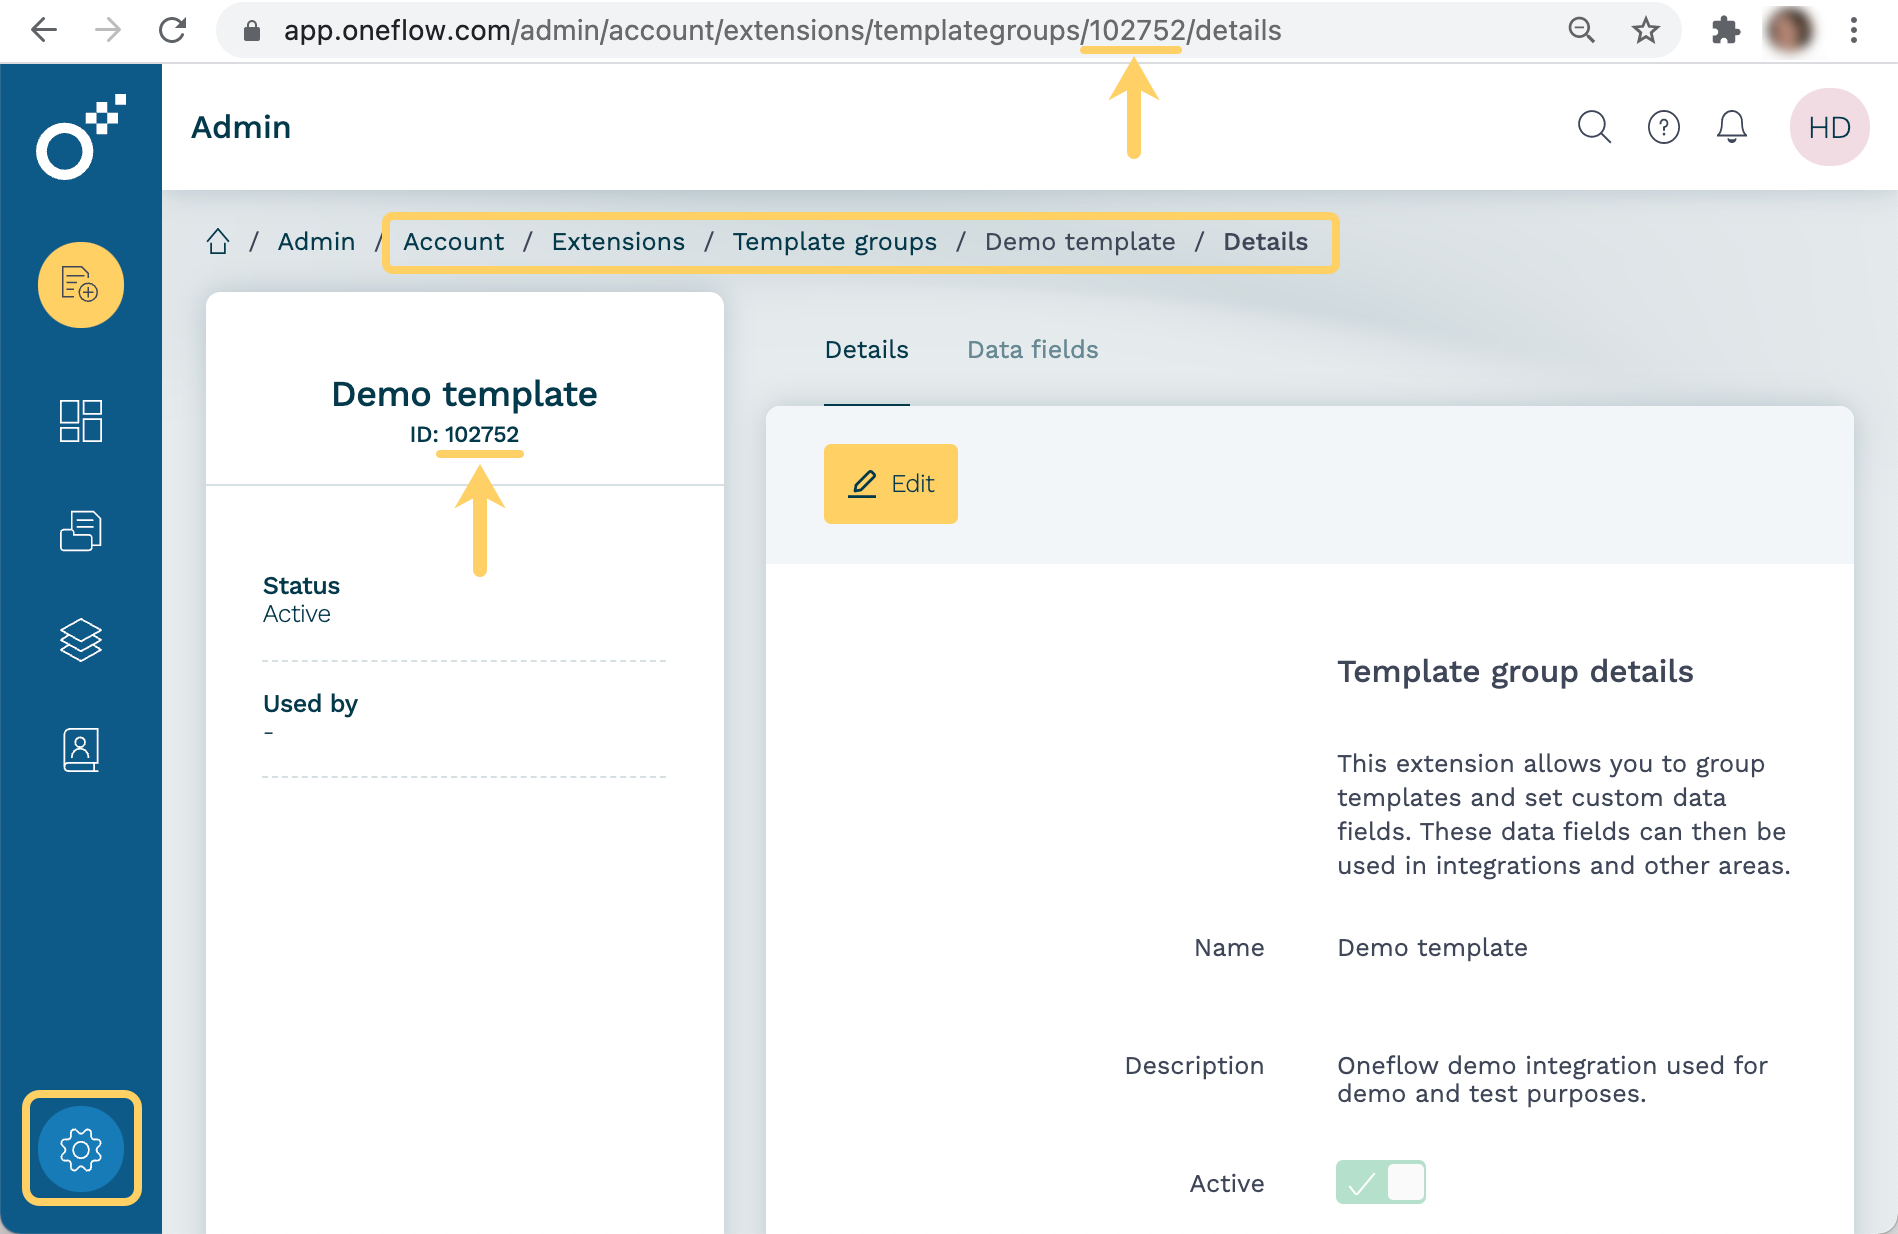
Note:At this step, you can note down the ID of the created template type and use it later to filter templates when creating a contract through the API. There are several ways of getting a template type ID:
- Template types page URL
- Template type details
- Templates endpoint.
Oneflow Integration extension
During the development phase, you will create one or more template types that you will use by their IDs.
Note:Since template types are specific to each account, the template type that belongs to your integration will have a unique ID for each account.
Once the Oneflow integration extension for your integration is in place, switch to your integration extension type to address your template types.
Step 3. Add data fields
The next step is adding data fields. The default limit for data fields in each template type is 150. However, you have the flexibility to increase this limit if desired by contacting Oneflow Support. Each data field should represent a single data point you want in the contract, like customer name, phone number, address, etc.
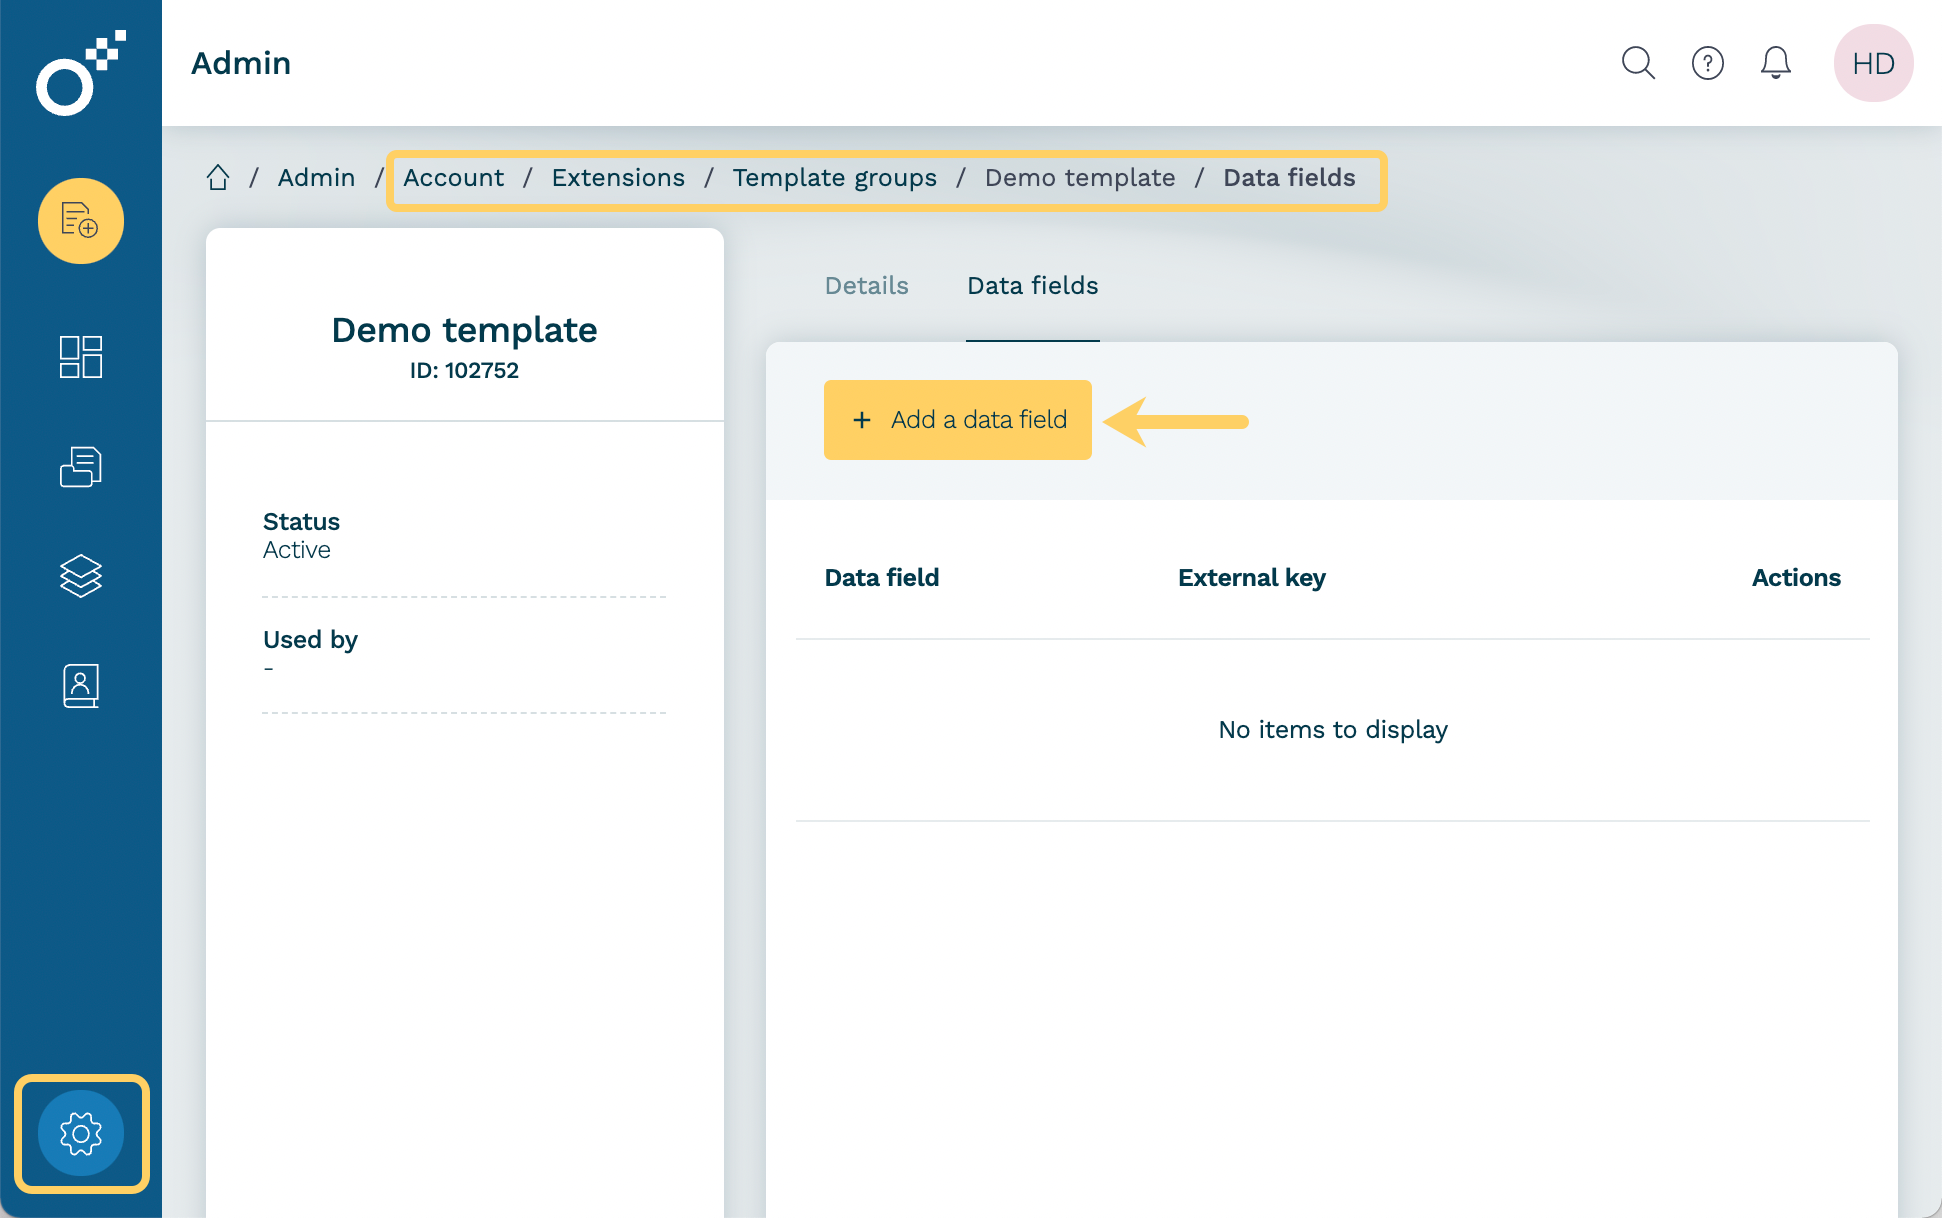
- In your template type, go to the Data fields page and click Add a data field.
- Specify the data field details and click Confirm.
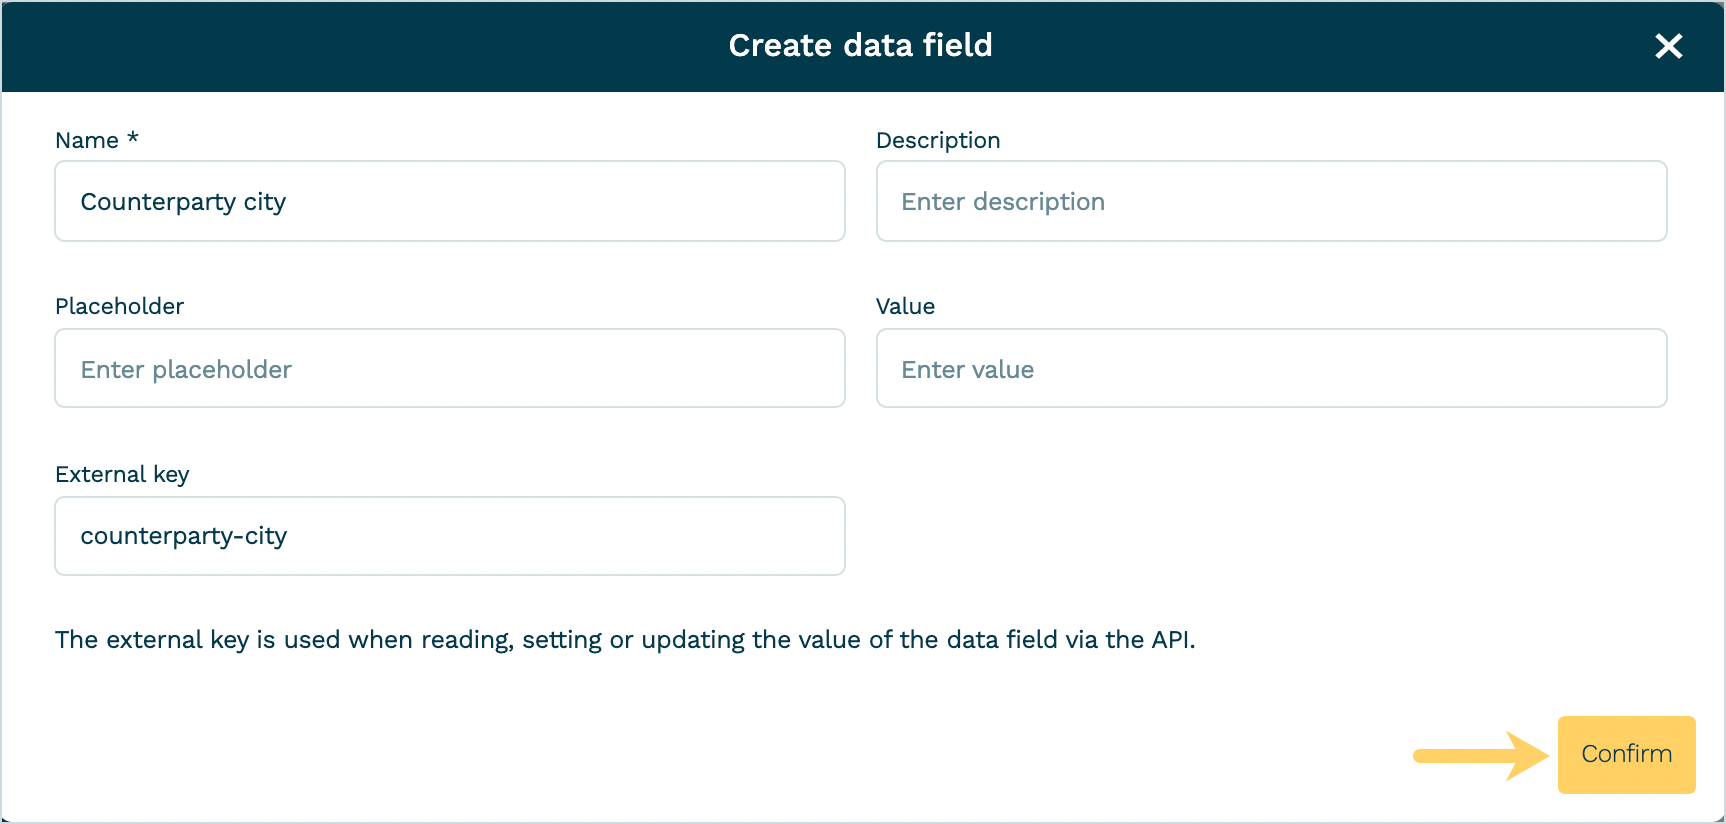
See Working with data fields for more details.
Oneflow Integration Extension
During development, you can add, remove or update the data fields as much as you want. Once you’re happy with the setup, Oneflow will use your template type with its data fields as the blueprint to configure the Oneflow integration extension.
Note:At that point, the data fields become locked and can only be changed by Oneflow.
Step 4. Create a webhook
To learn how to create webhooks in Oneflow, please see the Working with webhooks section.
Oneflow integration extension
During the development phase, events associated with any contract created via the API or application UI will trigger all manually created webhooks.
Note:This will no longer occur when the integration extension is in place.
When your integration extension is set up and enabled, only events on contracts created via your integration will trigger your webhooks. Even contracts created directly in Oneflow from templates with your template type will not trigger your webhooks. Vice versa, your webhooks will get events only from contracts created via your integration.
Part 3. Test API access
Now you are ready to start with your integration. Check the Getting started section and make your first request to the `ping’ endpoint.
Part 4. Set up your account
Now you need to set up your account to test the integration. To test your integration, create at least one workspace with at least one active template with the template type.
Step 1. Assign a template type
To assign a template type to your template:
- Make sure the template is active on the Templates page.
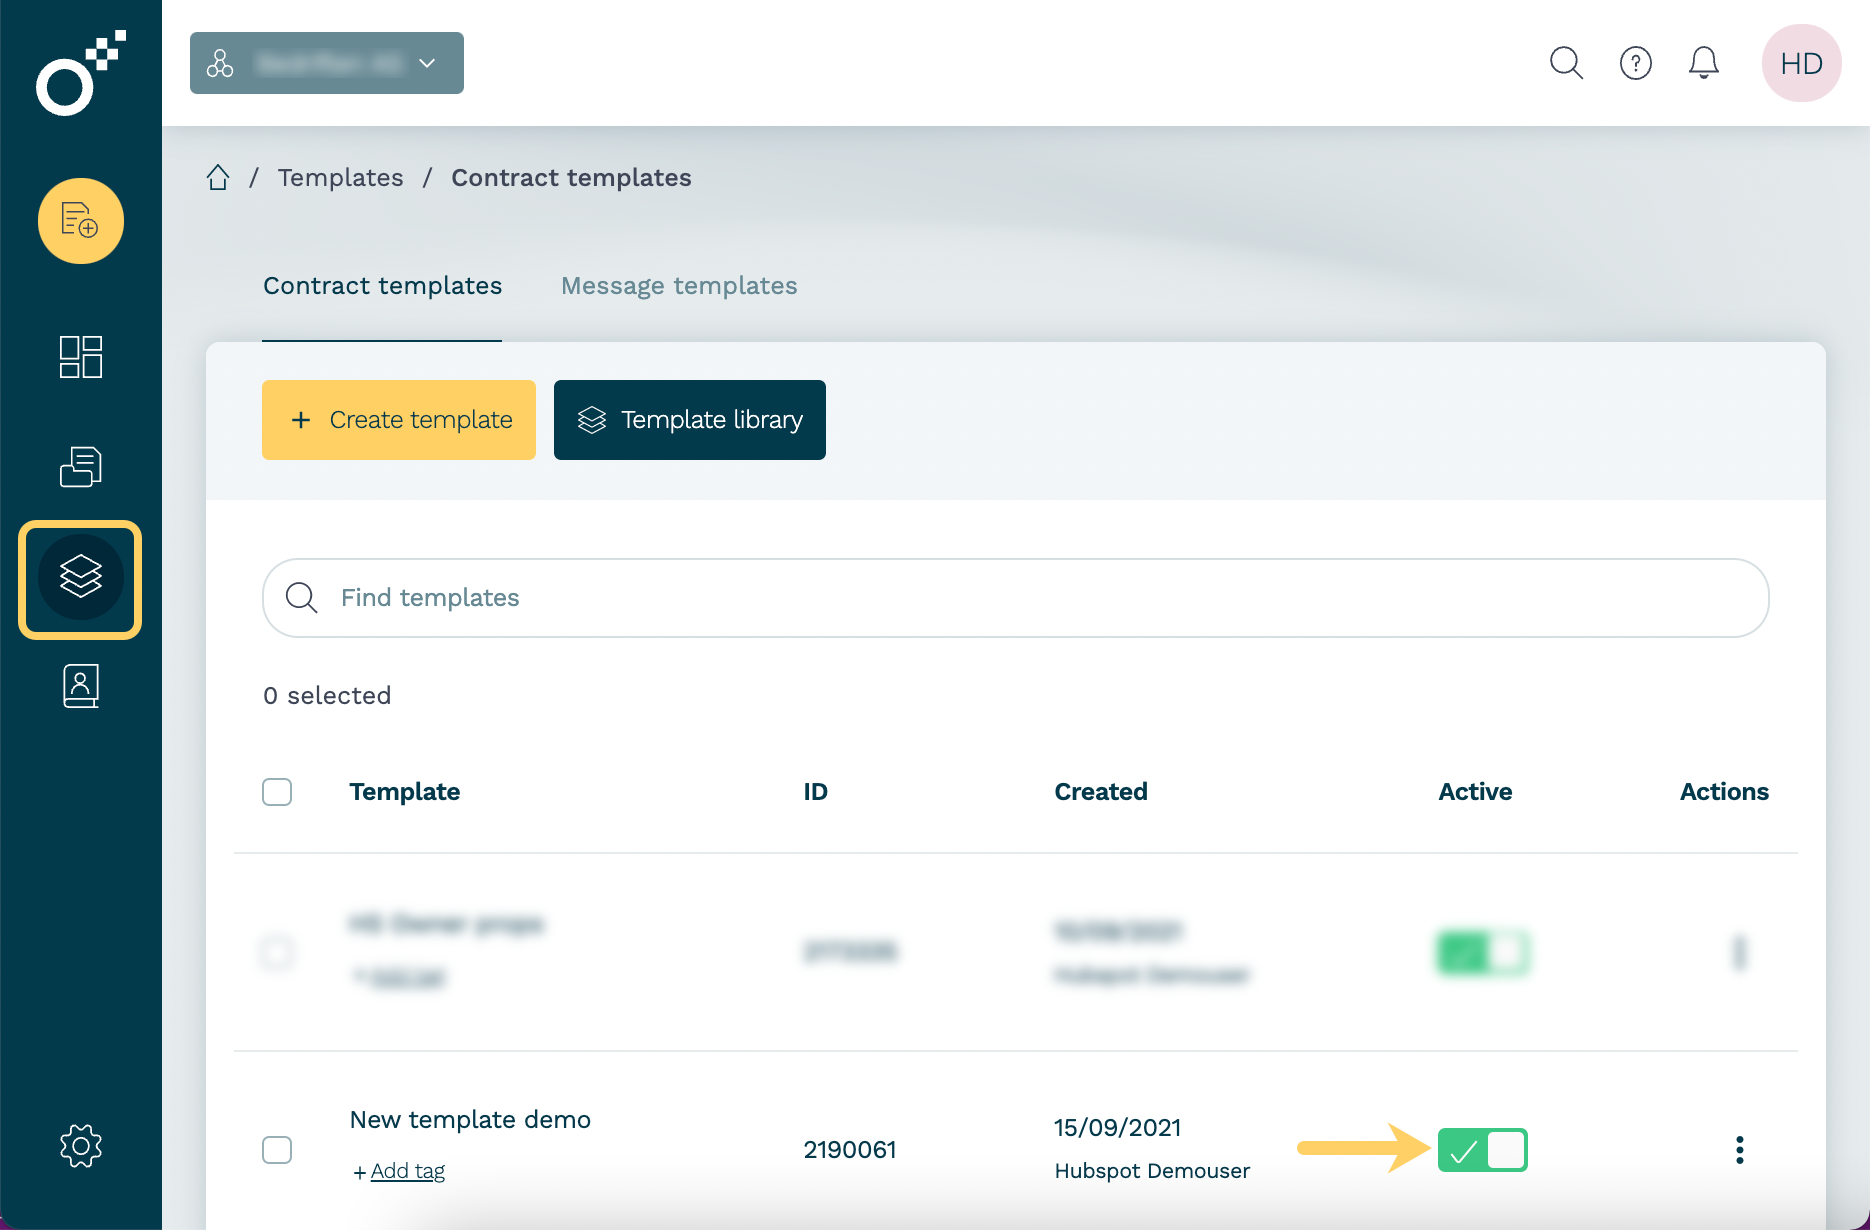
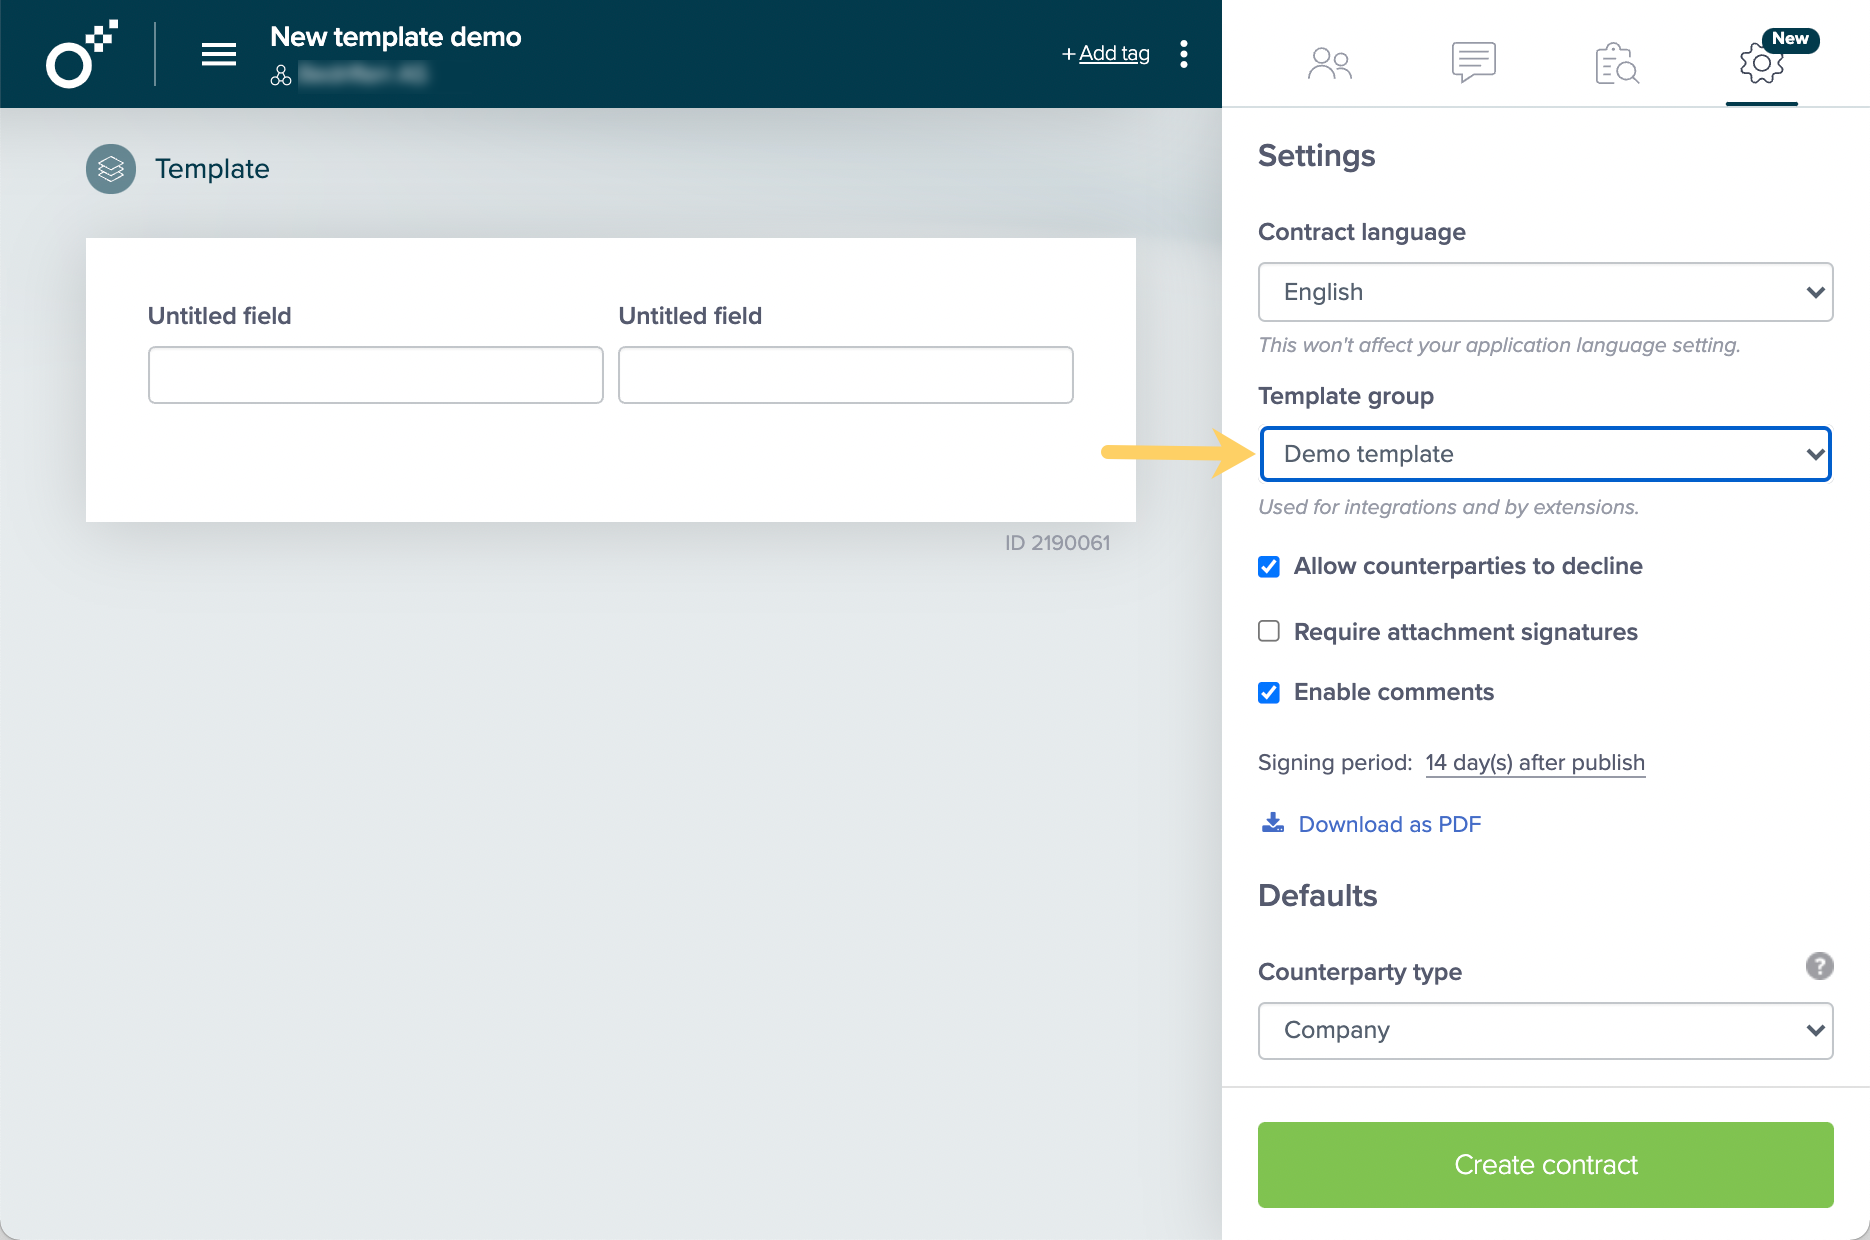
- Open the corresponding template in Oneflow and select the template type in the Template type field:
Step 2. Add users
Now it's time to add users to your integration and assign user permissions both in Oneflow and your system.
Note:Make sure to use the same user email both in Oneflow and your system.
To add users to your integration:
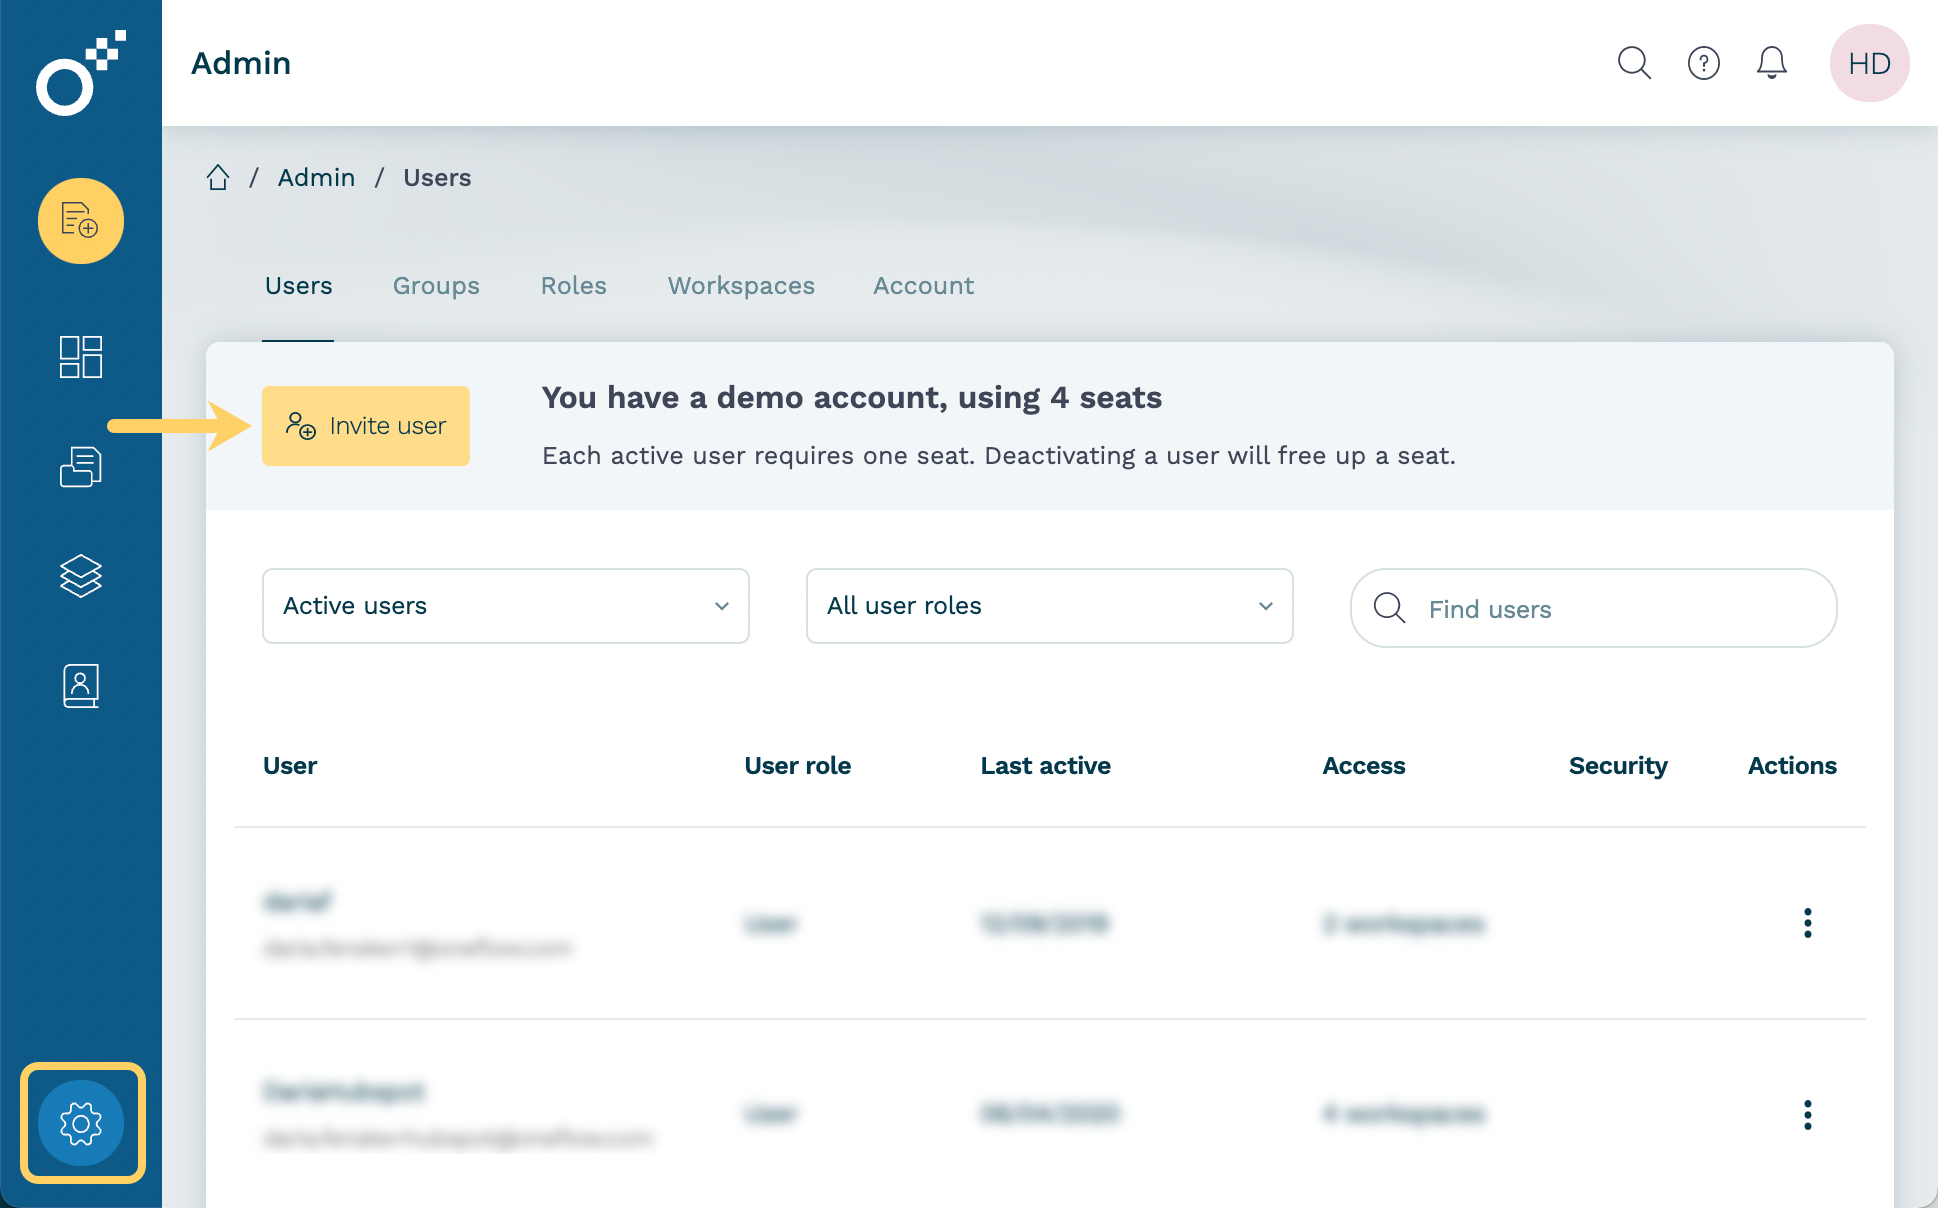
- Go to Admin > Users and click Invite user.
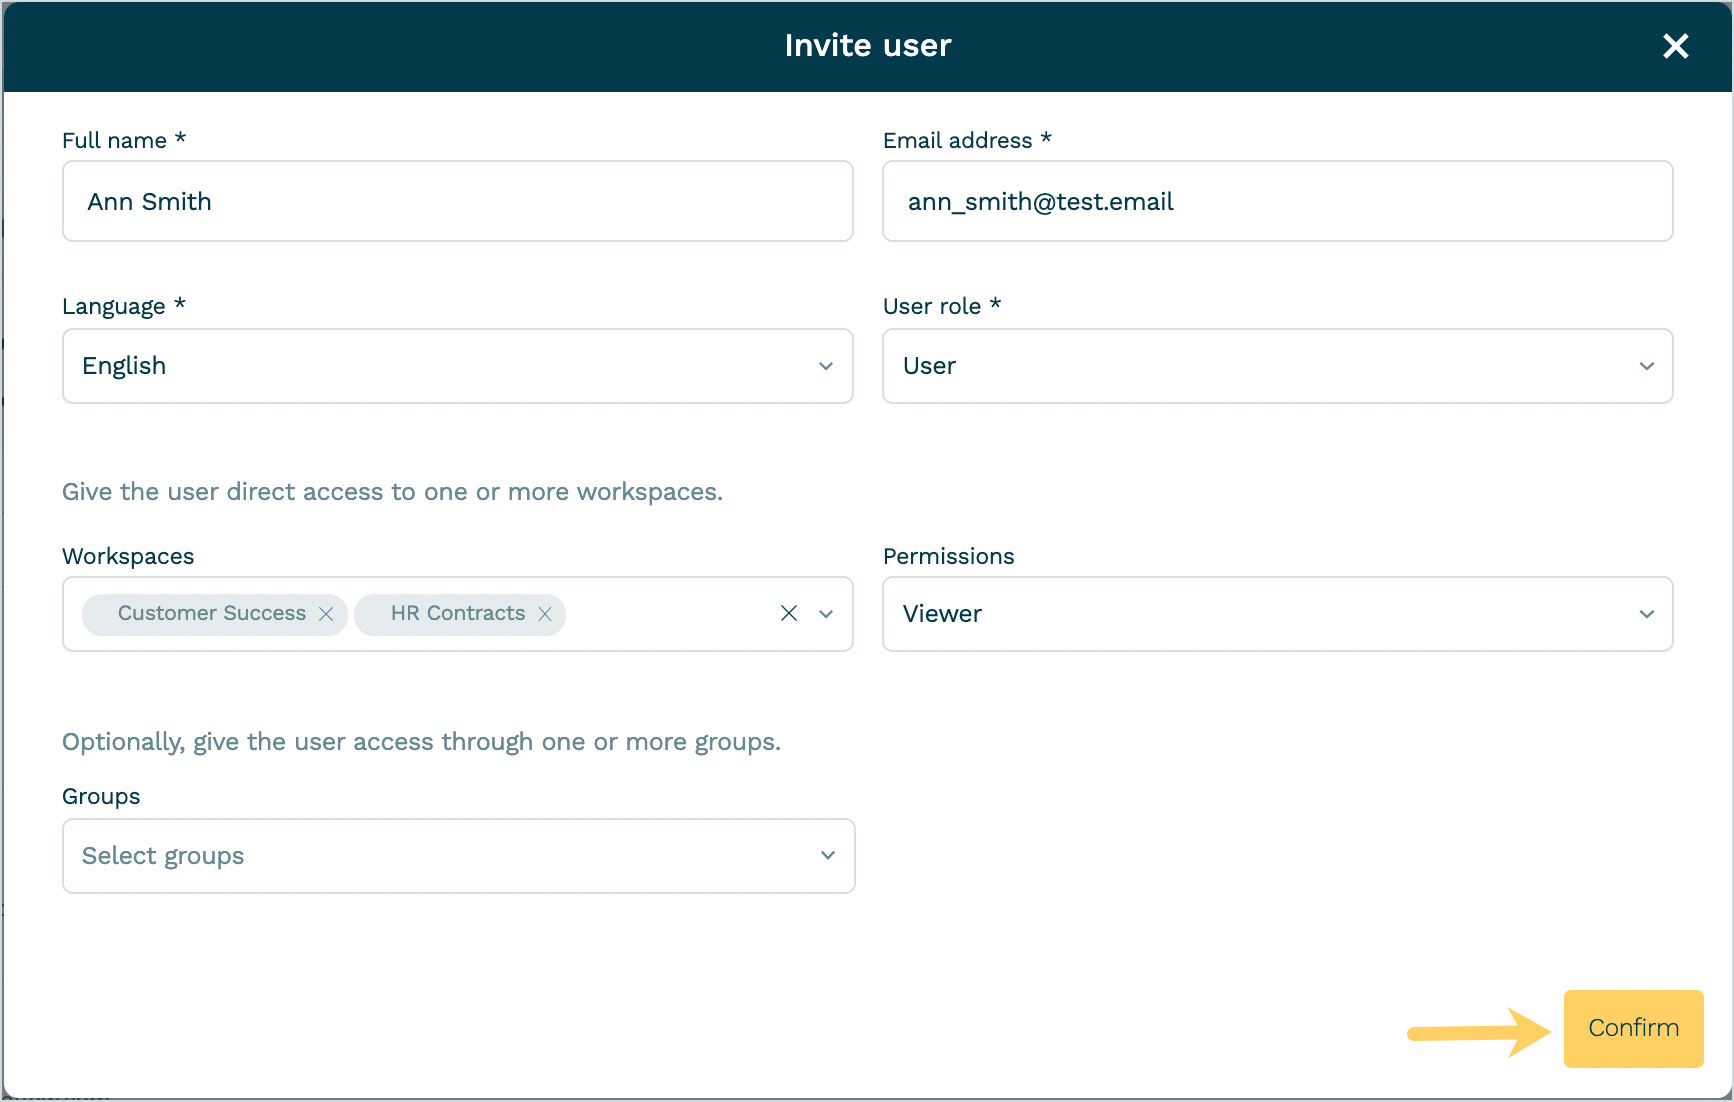
- Fill in the user details and specify permissions, and then click Confirm.
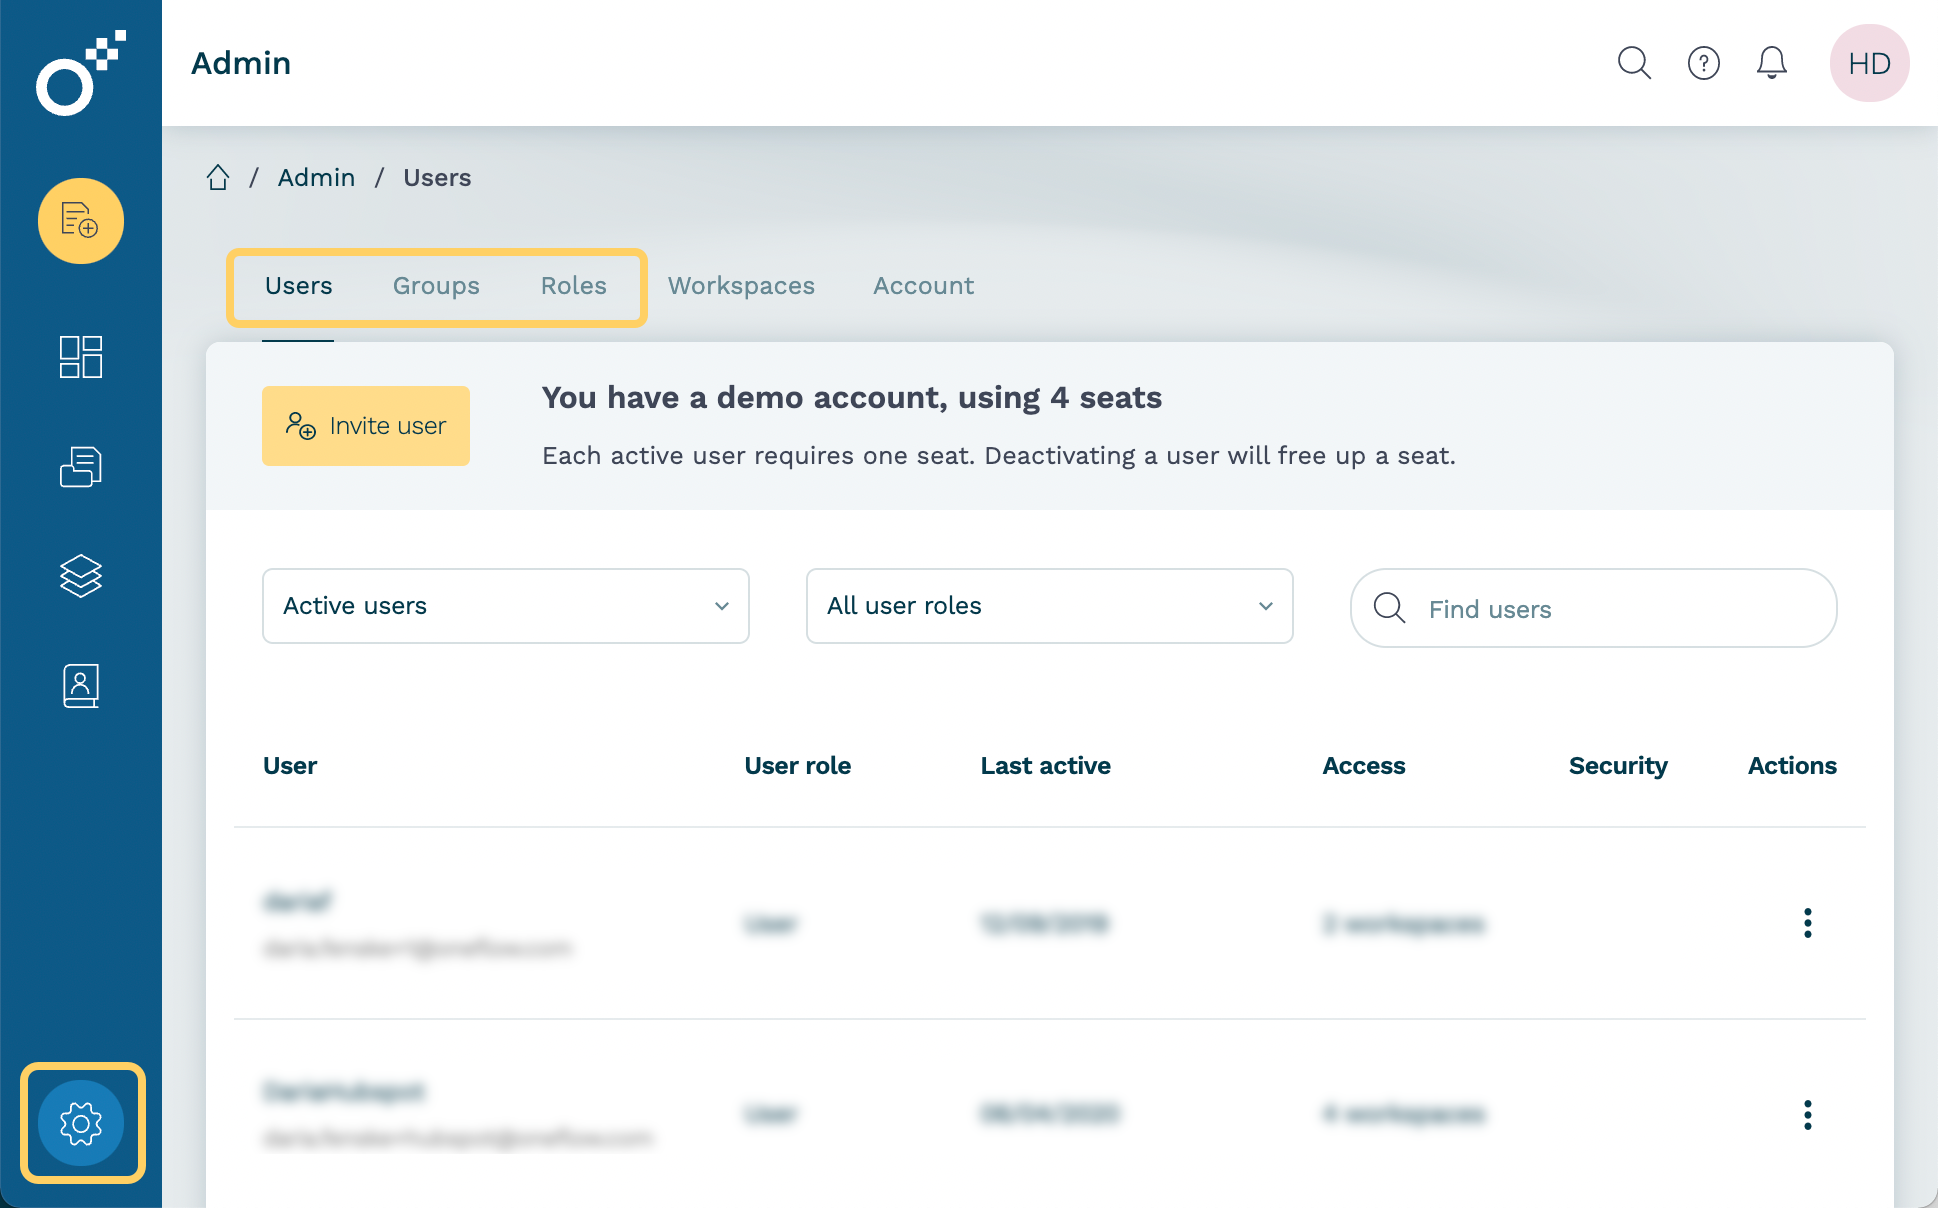
- To manage users in your integration, navigate to the Users, Groups, and Roles tab options.
Updated 5 months ago
